Basic usage
Demo mode
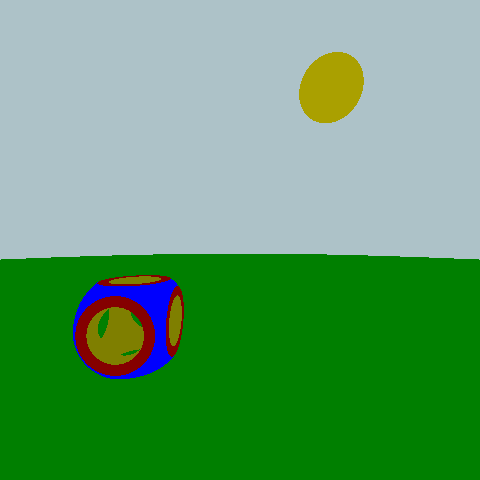
Once installed your KTracer, the first and very simple image you may generate is a demo. Running the command:
./KTracer demo
will render the image described in the file demo.txt, which by default is the following:
Converter mode
If you have run the demo, you may have notice that you have obtained 2 different files.
A ldr image, the one showed above, and an hdr one. This second one is useful, as it contains the raw
value of pixel color, without any tone mapping or gamma correction applied.
If the luminosity of the image does not satisfy you and you want to correct it, with the pfm file
it will be a child's play.
Just run the command:
./KTracer pfm2ldr --input <FILE IN> --output <FILE OUT> --format <FORMAT>
and set the parameters:
- --luminosity <LUMINOSITY> The required average luminosity
- --gamma <GAMMA> The gamma factor of the monitor
- --factor <FACTOR> a rescaling factor for colors (if interested, you can find more details in Shirley&Morley)
Render mode
If you are here for realistic image generation, this is by far the most interesting and fun mode you can choose. Once you'll learn how to produce the input file for setting the scene, this command will perform the magic:
./KTracer render --inputfile <FILE IN>
Even though the inputfile is the only mandatory flag, there are quite a lot of other interesting
features that may be activated while rendering an image.
Some of the most useful parameters are:
--width | -w <WIDTH>The width of the image--height | -h <HEIGTH>The height of the image--algorithm | -a <ALGORITHM>The algorithm used to render the image. See later for further information--ldr-o | --ldroutput <FILE OUT>The name of the LDR output file--nr | -n <NUMBER OF RAYS>Number of rays generated at each surface-ray interaction--maxDepth | -Md <NUMBER OF REFLECTIONS>Maximum number of reflections per ray--rrTrigger | -rr <TRIGGER>Depth value after which Russian Roulette algorithm activates.--AAgrid | --AA | --aa | -A <NUMBER>Number of divisions in each pixel's side to perform antialiasing (more simply, <NUMBER>*<NUMBER> is the total amount of samples per pixel)
Animation
With the help of ffmpeg also beautiful animations can be rendered with KTracer.
On our repository there is a script to create animations. You must have a variable in the input file
that is associated to the rotation of the camera, and using it you can create your own GIF.
